This guest post is a long time in the making (between weird schedules, my blogging hiatus, cake orders and email malfunctions) so enjoy!
--------------------------------------------------------------------------
In today’s world of DIY chic and popular cake shows, it’s easy to want to add pizzazz to everyday baking. Bring DIY flair to the kitchen with one easy-to-use tool: The star tip.

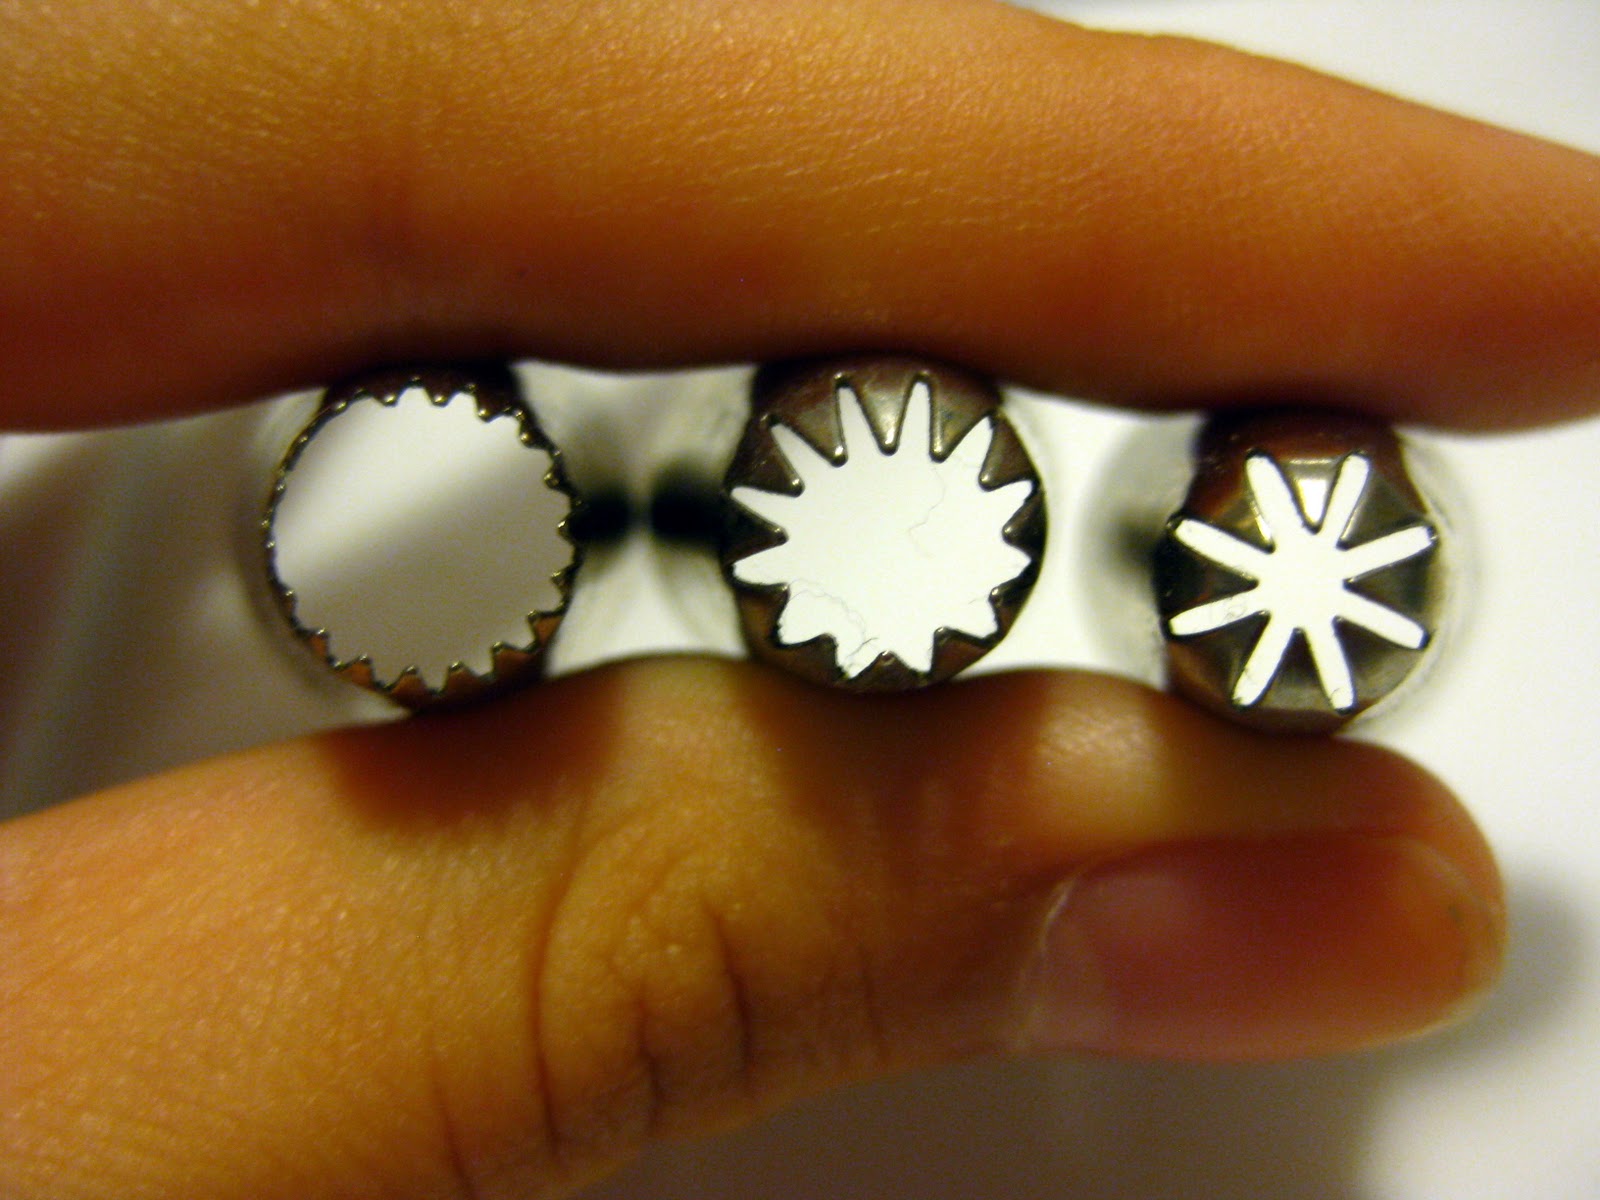
The star tip is my go-to tool for quick, easy, and impressive cake design. As a college student who also decorates cakes, this little baby helps me keep up classy cake design for my clients while still leaving time to study. The charmingly home-made flair that it can add to cupcakes is quick and easy, and can be morphed to any occasion. This is why I’ve chosen the star tip to share with you this fall. Let’s give it a try!
First, fit a disposable icing bag with a star tip. They come in all shapes and sizes, varying on the number of points and size of the centers. The bigger the tip, the fewer stars it will take to cover a surface, so choose a tip that fits well in your design and in the amount of time you want to spend on icing. Use a coupler if you plan on using multiple colors with the same tip.


Once the bag is fitted with a tip, fold the top third of the bag down and fill with icing. This keeps the top of the bag (and your hands) clean. I like to use Wilton’s buttercream icing (recipe: http://www.wilton.com/recipe/Buttercream-Icing). It holds its shape really nicely, takes few ingredients, and tastes just as delicious on graham crackers as it does on cake.
Squish the frosting to the bottom of the bag, just before it gets to the middle of the tip. Twist the top of the bag and hold it firmly in the crevasse between your thumb and pointer finger. Monitor how tightly you hold this: letting up on the pressure can cause icing to sneak out of the top of the bag and all over your hands, counter, and cake, but holding it with a death-grip will give you a cramp. Find a happy medium in pressure that works for you. Close your hand around the icing.


Hold tip perpendicular to the surface which you’ll be icing. Note that this does not always mean perpendicular to the table. At the edge of a cupcake, for example, perpendicular to the cake can be closer to 45 degrees to the table. Gently squeeze the bag with your middle, ring, and pinky fingers until the icing makes contact with the cake and spreads to a star. Stop squeezing. Lift tip straight away from the star, and voilà! You have a star!


Repeat those steps to make stars to cover the entire surface of the cake. It might help to say to yourself, “Point, squeeze, stop, lift; point, squeeze, stop, lift” as you go. The most common cause of awkward-looking stars while using the star tip is forgetting to stop squeezing before pulling the tip away. If you can master this, you’ll be a pro in no time!
Using these steps, you can do all sorts of things like shaped character cakes, tiered cakes, and impressive cupcakes. But that’s not all! The star tip can do borders and whimsical swirls of icing. Get creative!


It’s easy to add flair to your starred creation. Simply add any decoration you can imagine! Many can be easily found in local grocery and craft stores: candies, sprinkles, flower petals, sugar flowers, even non-edible toys or photos or party picks (be sure to let your guests know that these are not to be eaten). Just like that, you can turn a simple “Thanks for the cupcake” into a “You did this yourself?”


To upgrade the flavor of your cakes without hours and a dozen ingredients, I suggest trying {The Cake Mix Doctor Returns by Anne Byrn}. It’s a great cookbook that contains tips to tweak boxed cake mixes into deliciously moist cake with an incredible from-scratch taste.


--------------------------------------------------------------------------------------------
Amazing that those are all done with the same kind of tip!! Doesn't it make you feel like you could decorate anything? Care to see some of her other work?

Dude. A giant BOW on a cake. Love it!!

And those sugar flowers!! Oh Erin, I need another cake crash course.
Oh yeah, remember how I mentioned a giveaway/linky? Since Erin is so incredibly generous, she is offering to send one of YOU some hand piped sugar violets.

You could add these in a luscious bouquet atop a simple white cake. You could plop these on top of your newly star tip frosted cupcakes! You could do so many things with these.
So, how can you get your hands on them?
Easy, tell us about your favorite cake. Tell us all about that extra special birthday cake your mom made for you when you were six. Or your gorgeously decorated wedding cake you smashed into your hubby's face. How about that cake you made for your own daughter that she smeared all in her hair? Maybe your a cake decorator and you are really proud of your work. Whatever it is, we want to hear about it.
Write it up and link it up! Bonus points if you can find a picture. If you can't link up, no problem! Leave a comment with your story or email me at kittycatsandairplanes{at}gmail{dot}com
Contest will run through next Saturday, the 29th at midnight. Erin and I will deliberate and choose a winner to be announced on Sunday.
As for me?

This was a pretty good cake. :)