Showing posts with label upcycle. Show all posts

1.18.2012

The craft fair post!

You guys, you are so nice to me. :) Thanks for all of your appreciative, kind, and uplifting comments on my last post. Seriously, you are the best ever!

So....remember how I did a craft fair last month? I bet you forgot....I don't blame you. Life happens. But, as promised (albeit a month overdue) here is it.
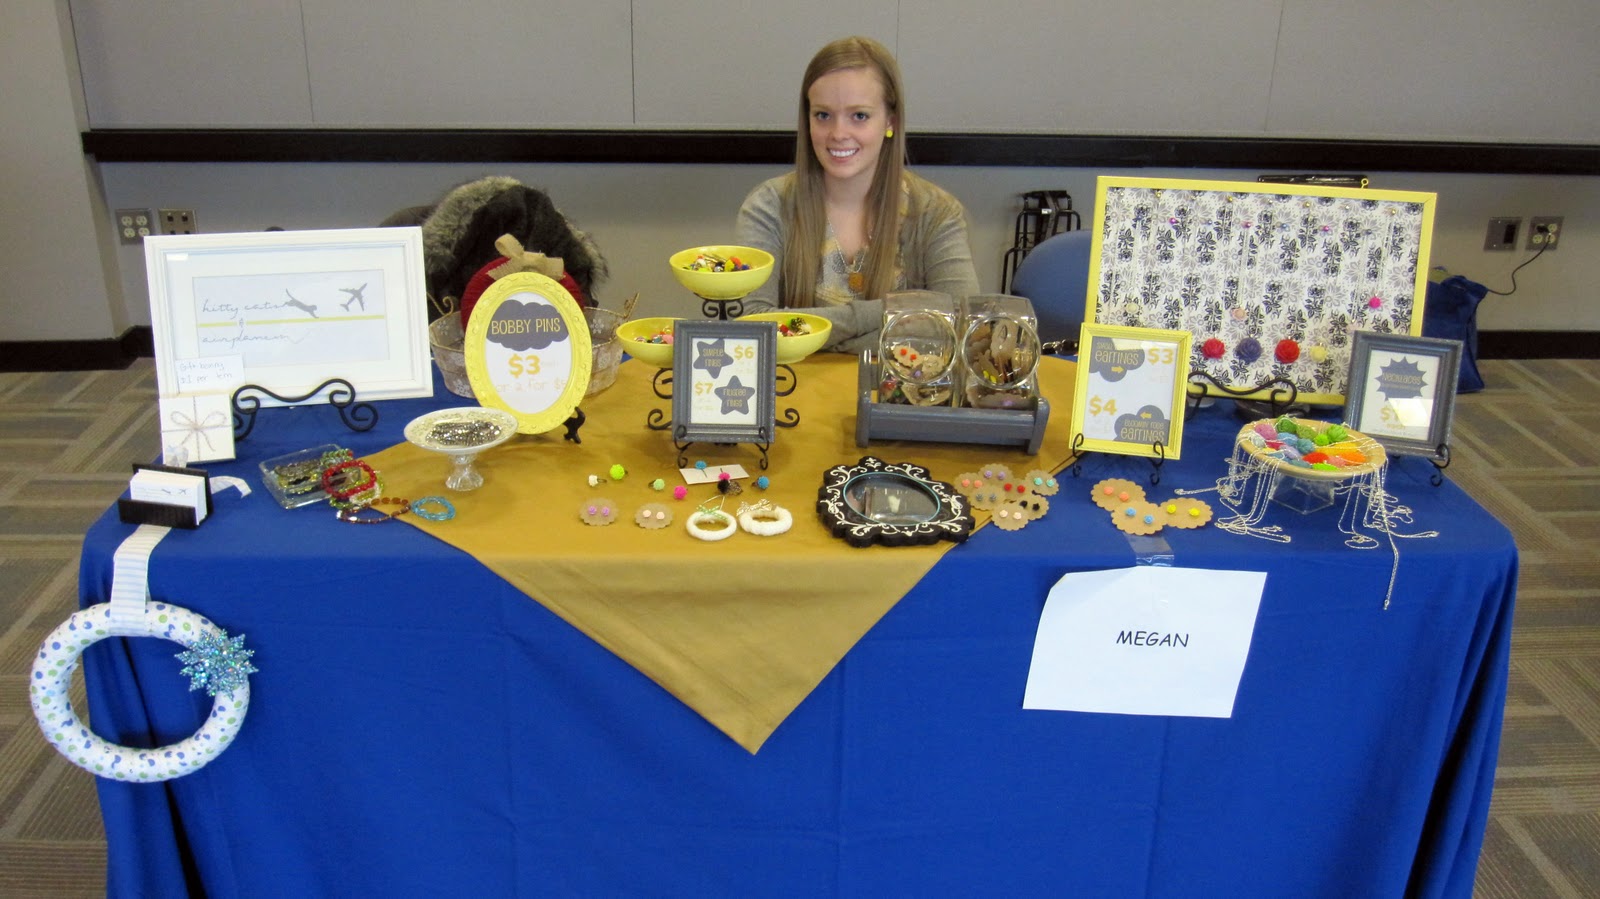
In early December, my crafty friend {Meg} told me that her work was sponsoring a small craft fair and asked me if I wanted to share he table with her. Um. Yes. The catch? The fair was in a week and a half. Yikes!!

Initiate panic mode.

I had never done a craft fair before, and I had only thought about it in a "hm, yeah maybe someday" kind of way. And all of the sudden the opportunity falls in my lap, and I am completely unprepared. I researched and researched and spent some pretty pennies stocking up on supplies. Inventory? HA. Yeah, I didn't have one of those. I decided to only stick with my very simple cabochon jewelry because I knew I didn't have time to work on intricate pieces. So I glued and glued and glued and glued until I was slightly high on toxic fumes and had enough jewelry to call an inventory.

I won't go into detail about the company that decided to wait 4 days to ship my items even though I told her I needed them immediately. I didn't get them until the day before, and stayed up extremely late the night before finishing everything. I now have premature gray hair.

Did you know that sane people prepare MONTHS in advance for craft fairs? Sometimes even for the entire year? I completely understand why now, there is SO much to do! I thought I just had to create an inventory, hooo no! I had to make business cards, build creative displays, plan a layout of all the supplies, label, nail down reasonable pricing, organize, plan out how to transport everything safely, make change, and so many more tiny things that you would just never think of. The amount of time I put into preparing for this craft fair was triple the time I spent at the actual fair! It was nuts! Luckily if I ever do this in the future I will already have a lot of the prep work done, but man, physical, mental, and financial toll here!

I got really lucky and found EVERYTHING I wanted at the thrift store (in one trip too!) that I used for display. Of course I went with a gray/yellow theme, it's my obsession right now, and it also has the advantage of being pretty neutral. Not that men were going to be drawn to my table anyway....

I was really so blessed to have so many things work out in my favor preparing for this! There are still some things I would have changed, but for my first ever craft fair and only 10 days prep, I think everything turned out just fine. :) I went in with zero expectations, and I was blown away! I sold much more than I thought I would, I made enough to cover all the expenses from preparing and then some! But truly, even if I didn't sell a thing, the experience would have been totally worth it.  Maybe I'll do a separate post on the specifics of what I learned, if you guys are interested.

And now, the breakdown of the display! That's really why you're reading, right? I got 90% of my display pieces from the thrift store. I used tons of small frames, a cork board, some vintage saucers on candlesticks, and a few unexpected goodies!

This cute earring display case? Used to be a cookie jar set. 

This crappy phone pic pretty much has is down, it was NASTY. The person that donated it didn't even bother to rinse it out, it was still full of crumbs! Sticky with kitchen grease, stained and dented, but with some heavy duty cleaner, sandpaper, spray paint, and a LOT of love, it turned out beautifully! It's now proudly sitting on display in my craft nook filled with earrings waiting to be shipped off. 

I loved this ring and bobby pin display! It kept everything organize and on different levels, perfect for picking through. Wanna know what it began life as?

Wooden bowls and a candlestick. Love it!

Each of my price displays started out as creepy pictures. I don't know how I did it, but I managed to score four scrolly, texturey pictures frames for all my price tags! A little sanding and spray paint and they turned out better than perfectness.
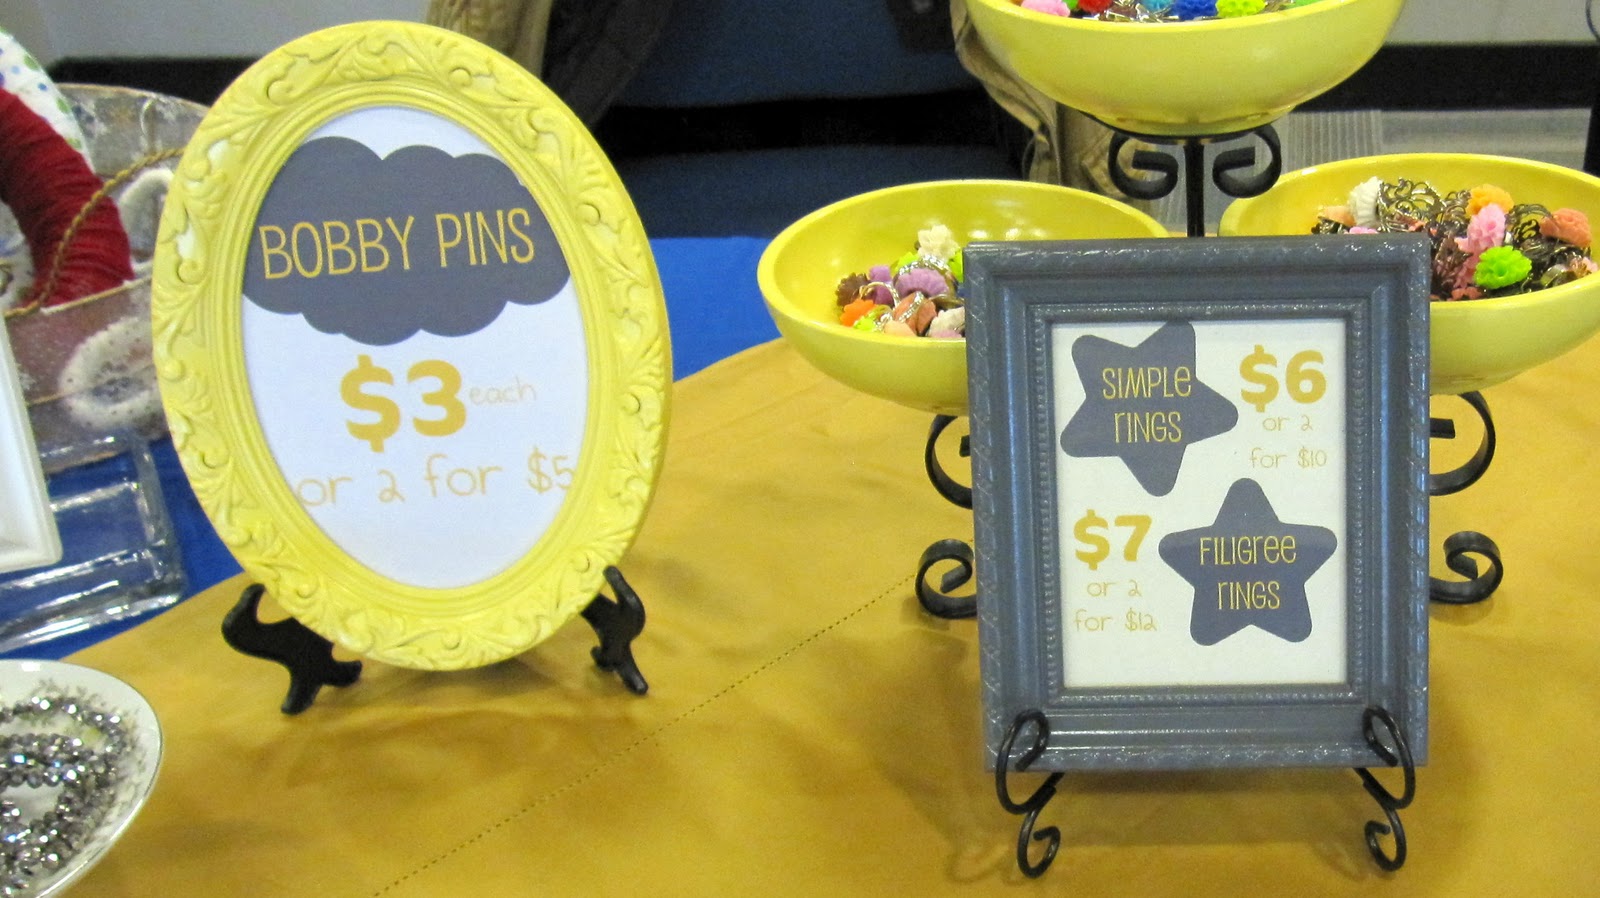
I made the price tags in Picnik, with my super awesome mad Picnik skills. (sarcasm font, in case you couldn't hear it.)

I had a larger frame to display my shop name and logo (it's all about branding right?) and the business card holder is a bamboo one from Staples. The little bracelet display?

Saucer + candlestick + E6000. I had one for bracelets and one for cab necklaces. 

I would have liked a bigger corkboard for these necklaces, but anything bigger would have been too hard to hold up and keep balanced on a tiny little stand. 

Did I mention I twisted the hubs' arm into coming with me? He didn't have school that day, and he was a huge help when I needed a potty/lunch break. 

Let me know if you have any more questions! Thanks for letting me crash your fair Meg. :)

PS, I'm sponsoring a giveaway over at Mine for the Making celebrating her 2 year blogiversary! Check it out {here}

12.17.2011

Vintage style cuff

First things first, this idea isn't originally my own. It was inspired by {this} tutorial over at I Heart Naptime.

Mine's a little different though. When I saw this pretty pleated ribbon at Hobby Lobby the very first thing I thought of was "Oh!! That would make an awesome cuff!" And here we are. You wanna make one?

Uh, don't mind the pic, I changed my mind a lot while I was making this. So, besides the glue gun, heat sealer, and scissors, you will need:

  • Pleated ribbon
  • Ruffled velvet ribbon
  • Buttons
  • Velcro
  • Satin ribbon

Just pretend everything is in the picture, mmkay?

Wrap the ribbon around your wrist and subtract an inch. Cut the smaller ribbon the same length, and glue the ruffled ribbon on the pleated ribbon right down the middle.

Ok...I cheated a teensy bit here. I used button shank removers to take the shanks off, but this isn't necessary. You could glue them down just fine or use your scissors to take the shanks off. Don't throw rocks at me!

Arrange your buttons on your cuff in a pleasing way, and glue them down.

To close the cuff, I cut two 2 inch lengths of matching satin ribbon and heat sealed the ends. I glued them on the back side of the cuff.

The Velcro part of it...it's really just measuring and guessing. I wrapped the cuff around my wrist and overlapped the ribbons, then a glued on the Velcro where the ribbons overlapped.

See? It didn't totally match up, but since I measured it against my wrist it worked out perfectly!

And I really love how it turned out! The gold buttons really gave it a more vintage-ish feel.

(Dude, my hair is cuh-raaaazy in this one!)

I seriously love it, I want to wear it with everything and I am typically not a bracelet person.

We still have one more day of the Jewelry Making for the Non-Jewelry Maker series! Though tomorrow...I cheat a little bit. :( There are a few easy to find jewelry supplies but I couldn't pass up the opportunity for some really simple jewelry.

I'll give you a hint. It's the necklace I'm wearing.

12.16.2011

Ribbon and chain necklace

I am still sticking to my "no fancy tools or supplies" rule here, promise! Today's tute comes from the trim departments of both Joann and Hobby Lobby. You would amazed

Yup, seriously. That's some metal trim from Joann. It's a bit pricey, so if you go looking for it make sure to bring some coupons. The whole thing ties together with ribbon (as do most of these creations.) Ready to make your own?

Aside from scissors, glue gun, and heat sealer, you will need:

  • Metal trim (or if you want to break the no supplies rule the jewelry section has some lovely chain)
  • Satin ribbon

These materials lists seem kind of pointless don't they?

First, cut your trim to about 12-14 inches long.

Heat seal the end of a 12 inch length of ribbon

Thread it through a link and glue it down. Repeat on the other side.

Don't worry, I'll keep your secret when you give away one of these to each of your friends and neighbors.

Oh wait, you have some chain leftover?

Same thing as the necklace. Measure the chain around your wrist and subtract an inch and use 7ish inch ribbon strands.

Weave some pretty trim through the links if you're feeling really fancy.

Use another length of ribbon to cover up raw edges. Better make two for good luck. NOW you're done.

I've been really into stacking bracelets lately! (See that ring? It's a button threaded through a thin hair tie using the same method from earlier this week. Holla!!)

Hope you're having fun with this little series! I have one more tomorrow and one "cheating" post.

Happy crafting!

12.15.2011

Sparkly garland necklace

Here I go again making necklaces out of garland. (In case you missed it the first time, check it out {here}) I can't help it though, garland can just be so pretty! Especially when it's sparkly...

May have looked better on the tree, but nope! A necklace it shall become.

A very pretty holiday necklace! I am thrilled with how it turned out! Wanna make one?

Aside from your glue gun, your scissors, and your heat sealer (remember that trifecta we use everyday?) You will need:
  • Sparkly garland, got mine at Hobby Lobby
  • Thick satin ribbon (think this is 1 3/4")

And that's it. Easy peasy 1-2-3sy.

Cut two lengths of garland, one should be two inches shorter than the other. I did a 14 inch strand and a 12 inch strand.

Cut and heat seal two 12 inch lengths of ribbon. I also folded over and glued down the ends so that it would be a little bit more sturdy for the garland.

Glue the longer strand of garland to the bottoms of the ends of the ribbon (as shown) and then glue the shorter strand just above that (as not show, because I spaced and didn't take a picture.)

And that's it. Seriously. I feel silly posting these tutes because all but one took me less than 10 minutes! But I couldn't pass up the opportunity to show you how to make inexpensive jewelry at home with no special tools.

I am now a sparkly, dress clad, ready-for-a-party happy camper. That's the last of the "formal" looking jewelry  tomorrow we start casual, everyday jewelry! See you then my friends! :)

12.14.2011

Vintage style ring

As promised with your little teaser yesterday, the tutorial for the beautiful vintage style ring! It is so easy, you'll want to make a million of them. Not to mention they are adjustable, and take less than five minutes. Is that enough persuasion for you?

And they are so dang cute!! Eeps!! Ok, you will need:


  • Old hair tie
  • Vintage pin (or a regular pin, or a button)
  • Hot glue gun
  • Ribbon

Yeah, that's it. And you've probably already got all of it.

Measure it around your finger, you'll want it to be a teensy bit smaller than your finger so it will fit snugly. 

Cut it (oops, forgot yo mention you needed scissors, sorry). 

Hot glue the ends together. Cut a small piece of ribbon and heat seal it. 

And glue the ribbon around the raw edge of your ring. 

Pin that little pin on over the ribbon. The thickness of the band and the ribbon should keep everything nicely in place. If you have a button sew or glue it on. 

And slap the sucker on! Five minute cocktail ring anyone?

This is my serious model face. Obviously I've perfected it over the years!

But in all honesty, pay attention to that ring. That blingy little sucker deserves the attention. Not my lack of eyebrows. It's one of the major downfalls of being naturally blonde...your eyebrows are naturally blonde and they kind of disappear into your face. One time, when I was a wee youngin, I was in the grocery store with my mom and suddenly shouted:

True story. No, it really is a true story. And to think they've actually gotten a teensy bit darker since then.

Come back tomorrow for the last bit of "formal" jewelry! Hope you are liking the series so far. :)
Related Posts Plugin for WordPress, Blogger...