Showing posts with label scrapbook. Show all posts

3.01.2012

My Memories Giveaway!

If you have ever met my mother, you would know that she is an awesome scrapbooker. The kind that would sit down and churn out page after page after page of sheer awesomeness. She was a total hipster, scrapbooking WAY before it was cool. When I was around 10 years old, she let me take the reins on some of my own pages. I loved it, I wouldn't call myself a complete natural, but I loved creating my own pages and unleashing my imagination through paper punches and embellishments. Then I hit high school, college, and married life and I'm looking zero time in the face.

Helloooo digital scrapbooking!!

You've heard of My Memories, I'm sure. They are HUGE in the digital scrapbooking world. With {My Memories Suite} digital software, you can create a master piece in no time at all, in the comfort of your own home, behind your own computer!  This software is super easy to use and allows you create beautiful scrapbook pages in minutes! (Yes minutes. You have two minutes right?) The program also lets you create scrapbook pages, cards, calendars, gifts and photo books with just the click of the mouse.

My Memories Suite digital software can be used on both a Mac and a PC.  Once installed on your computer, the software helps you create pages from templates or from scratch, for those of you with a little more time:) I tried both! Want to see?

I made this one from scratch. 

And this one came from an album template. Love the geometric designs on this one. 
  
They even offer video tutorials on how to get started and what you can do with the My Memories Suite software! Perfect for visual learners like me. Click {HERE} to watch the video to see if this software is right for you.

When you purchase the suite, you receive 30 album templates, more than 1,500 papers and 1,000 embellishments. Enough to keep you busy for a long time!  But, if you plow through things pretty fast, you can buy templates, papers and kits, which range from FREE-$9.99.  

easy-to-useinteractive-featuresvideo-featuresshare-again-and-again
Easy to make in minutes, and easy to share. Perfect. You can even do videos too!

So do you want to win this amazing software too?
One winner will receive: {My Memories Suite Digital Scrapbooking Software} ($40 value)

To Enter: Head on over to {My Memories digital shop} and leave a comment telling me which digital paper pack you would like to use with your photos. mandatory

For Additional Entries:
Follow Kitty Cats and Airplanes through GFC, email, or RSS feed
Like {Kitty Cats and Airplanes} on facebook
Like {My Memories} on facebook 

This giveaway is open to anyone and will end on Thursday, March 8th at midnight EST.  

If you don't win or if you can't wait to use the software...

Order through Kitty Cats and Airplanes and you can save $10 on the {MyMemories Suite} V3 and a $10 coupon for the {MyMemories.comstore!  Use this code:  STMMMS60906 

Good luck to everyone! Random.org will choose the winner and will be announced on Friday, March 9th. 



10.15.2011

Guest Post: How to make your own scrapbook embellishments from CreationsbyJune

Our last (but CERTAINLY not least!) guest poster is June from {CreationsbyJune} June is one talented chick, you need to see some of her paper bag albums! And check out her latest Craigslist find...I am sooo incredibly jealous of the deal she scored! She's here to teach you how to make your own scrapbook embellishments. If you're anything like me, saving a few bucks on pretty things sounds like my kind of day!
-------------------------------------------------------------------------
Hello!  My name is June and I have a love for things that are shiny and sparkly and soft and fun!  You will find me over at CreationsbyJune I do a little of this and that, but try to stick with just scrapbooking and sewing and maybe some furniture refinishing.  I tend to get in over my head with some of my supplies, but also just hate to spend a ton of money on supplies.

Have you noticed how much the prices have increased on scrapbook embellishments?  I have came up with a few ideas to help decrease the cost and still get exactly what you want, without a lot of effort!

I really like the look of metal, but again the price thing. I have found a way to get the metal tag look on a budget.
 Here is where the clay comes in.. I used black clay.  The usual price is around $2.79, but I always wait to get the 40% coupon before I buy clay.  It is really important to follow the instructions.  You need to knead the clay for about 10 minutes or so and then it becomes a lot easier to handle.
While working the clay, I go ahead and pre-heat the oven 

 I roll it out on my counter and get out my stamps.....  I have acrylic, but that is just my choice, any type will work
 Once I have stamped the image on the clay, I use a knife to cut around the image.  I try to get it in the shape I want at that point, but if you don't, you can still  cut the shape even after you bake the clay.
I always do several at a time, so I can just have the embellishments on hand.  With this type of clay, the directions indicate to bake at 275 degrees for 15 minutes, but some clays are different


 The other thing I do, is bake on parchment paper.  It just makes it easier to handle, but it is not an absolute necessity.  Once the baking is done and the shapes are cooled off then the fun begins.  Like I said, I like the look of metals, so I go to my set of metallic inks..
 I just smear it all over the clay shape....


They look beautiful, don't they?  I just use a rag and  and rub the ink into the clay, think of it like you are shining or burnishing.  You can add more ink, or just a minimal amount, depends on what look you are going for.  If you notice the edges are not smooth or in the shape you want, you can go ahead and use scissors to cut in the shape you want.   Are your ready to see the final product?

 Hard to tell it is clay now!  You can even add a hole and use as charms for jewelry or a whole variety of things.  I used 2 packages of clay, total cost of about $3.50 and ended up with 20 different embellishments... not  bad deal and they are all ones that I would use, so no more buying a package of embellishments for the 2 or three you like and the others going to waste!

On to easy peasy idea number 2......  I use stickers and love the dimensional ones, but again with the cost..... I had found this Halloween paper and loved it and thought the bottles would be pretty cool individually.  So I took some liquid glass and filled in the shapes...

 I just cut the bottles out and used them individually for my Halloween books..


 Are you ready for the last idea for uniquness for your scrapbooks?  What if you have a favorite shirt or wedding dress or baby clothes or... you get the idea...  How can you put that in your scrapbook?  Take a photo and add it?  Well, when I was in Hawaii last year I picked up some fabric and loved it and thought it would make some great scrapbook paper..
 I did the easiest thing EVER!  I copied it on acid free paper....
 And now I have totally unique paper!  Think of that for like wedding or baby albums.  How cool would it be to have a photo of the bride and groom matted on paper that is made from the same material as the dress.  Or a photo of the baby matted on paper that is the baby blanket that great grandma had made for grandma?  Just a lot of different thing you can do.  I got mine printed at the local scrap book store and it only cost about a dollar for one.

So now you have three different ideas for unique scrapbook embellishments that will not break the bank!
---------------------------------------------------------------------------
Sheer brilliance!! Photocopying fabric? Genius! Why didn't I think of that? Thanks for posting June!

10.14.2011

Guest Post: How to tie a bow on a card from I Hold All the Cards

Today we have my real life friend and freshman year college roommate guest posting! Brielle blogs over at {I Hold All the Cards} What a clever name right? I've already talked about her {here} but if you are new to KC&A you might not have seen her! Brielle makes AMAZING handmade cards, she's really got a knack for it! And I have owned five of them, so I know it's legit. They are awesome. She's here to teach you how to tie bows on cards, the pretty way!
---------------------------------------------------------------------------
As requested I am posting a tutorial so you can tie the bows you've seen on my cards. There are several different ways to tie bows. I like the two that I am showing you the best. They are easy to do. I've taken step by step pictures...which wasn't easy by the way. I had to tie the bow with one hand and hold the camera in the other.

Helpful hint...Use ribbon that is the same on both sides. If there is a print on one side it is a little trickier to get the print facing the way you want it.

Ok Lets get started. I'll start with the method that saves the most ribbon.

Both of these cards use this method.
Notice how the ribbon is tucked between the embossed paper and the card base.
The ribbon can not be seen on the inside of the card. Even if that white piece of paper wasn't on the inside you still wouldn't be able to see the ribbon. Got it?

When I tie my bows I tie it with the ribbon still on the spool. I don't cut a piece off. It wastes less ribbon and it is easier then trying to guess how much you will need for your project.
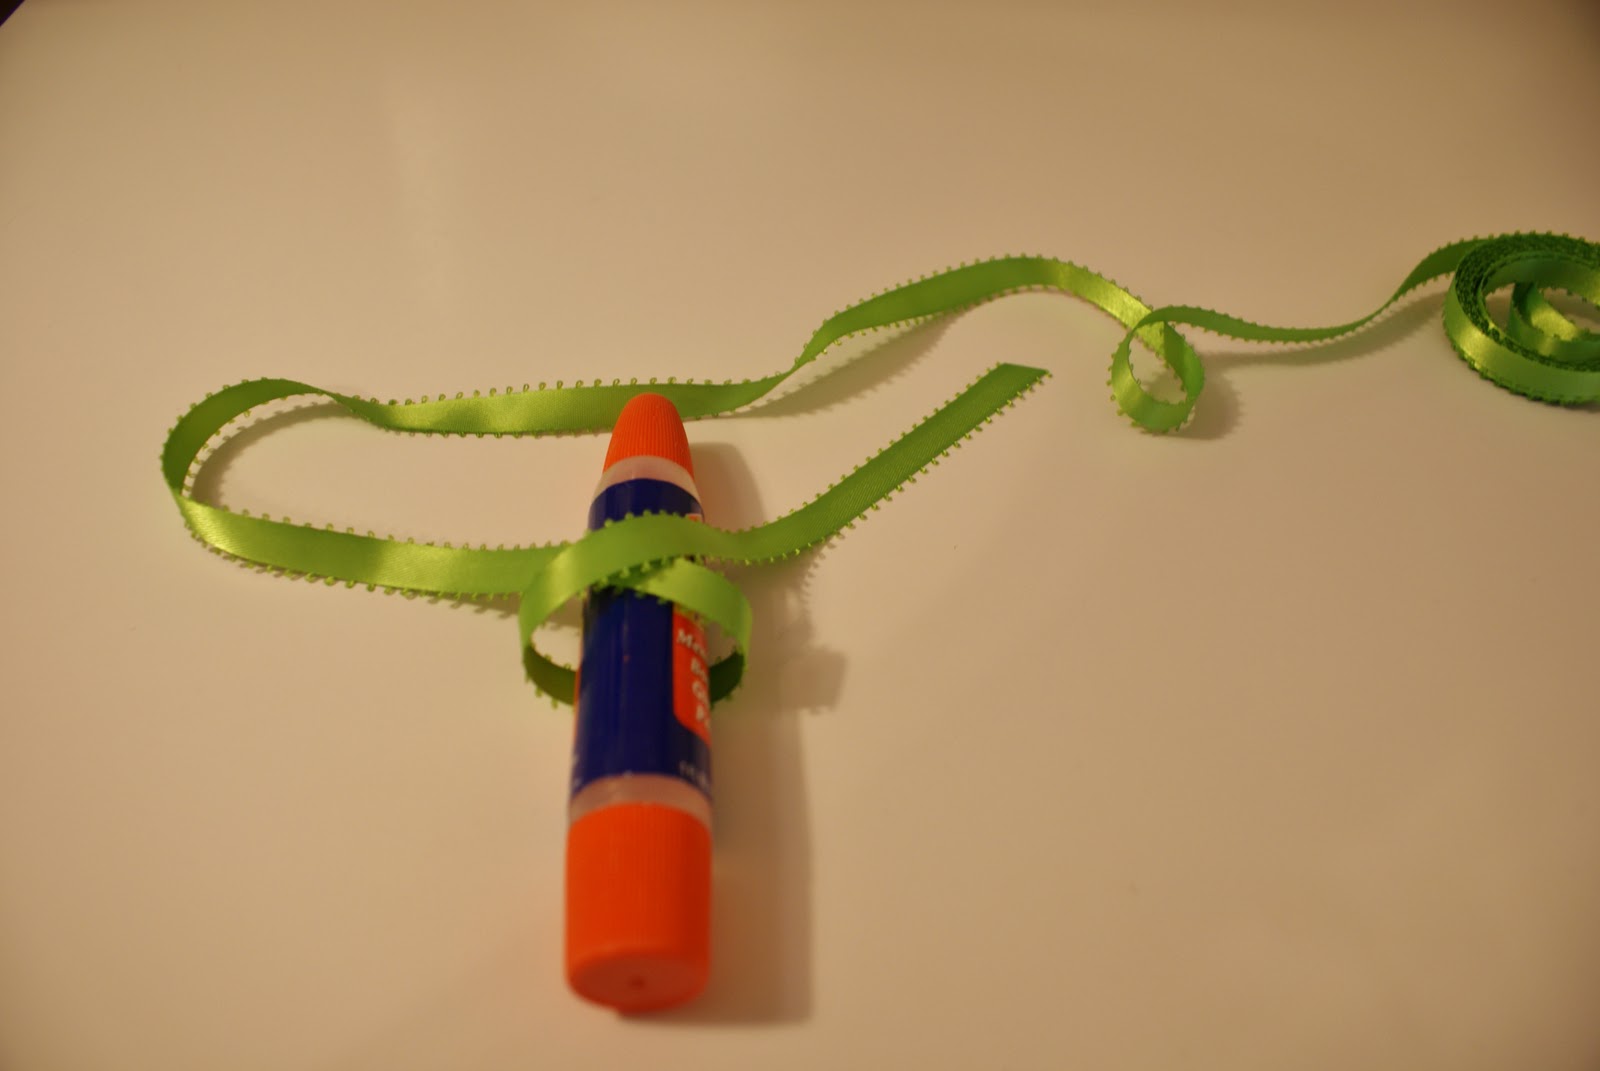
I use this glue stick to tie my ribbon around. You can use a regular glue stick or pretty much anything else that that a similar shape.
Confused? You are just tying a double knot.
Pull the glue stick out.
This is what it will look like.
Cut it off from the rest of the spool of ribbon.
Use scissors to cut the center of the loop at an angel.
See?
This is what it will look like
Sometimes I pull it tighter or adjust it a little. Just tug on the short part of the ribbon.
Use double sided tape to stick it to the cardstock.
wrap the extra ribbon around the back and glue the cardstock to your card base.
Voila!
You can see it doesn't show on the inside of the card.

Now you know how it is done. If you have any questions leave me a comment. I will be posting my other bow tying method tomorrow. (Amie comment, I'm late posting this, so it's actually over there right now!)
---------------------------------------------------------------------
See what I mean? Thanks Brielle! Don't forget to head over to {I Hold All the Cards} and leave her some love. :)
Related Posts Plugin for WordPress, Blogger...