This necklace was a special request by a friend who was gracious enough to take some pictures for my shop with her fancy camera. As compensation, I told her I'd make her anything she wanted, and she chose this beauty.
The {
Rubies and More} necklace from {
Sundance}. Sadly, it's no longer available, but I AM going to teach you how to make it so that should make up for it! I think it turned out really nicely.
I altered it a little bit according to what she wanted, like adding an extender chain. Want to make one yourself?
You will need:
- Side drilled, tear drop shaped red beads. I needed two strands
- Flat, coin shaped silver beads
- Shiny faceted silver beads
- Tiny little pearls
- Extender chain
- Lobster clasp
- Thin cord. I used cotton cord but the original necklace uses leather.
- Fray check (if using cotton cord)
- E6000
- Jump rings
- Tiger tail or other stringing material
- Crimp beads
- Crimping tool
Yikes, that's a lot. Got it all?
Whenever I string beads, I always string directly onto the spool or tiger tail to make sure that I don't run out of material. String on about 15-20 red beads. Then alternate flat beads with pearls so that you end up with three silver beads and two pearls (I changed it after I took the pic.) Then strong on three more red beads.
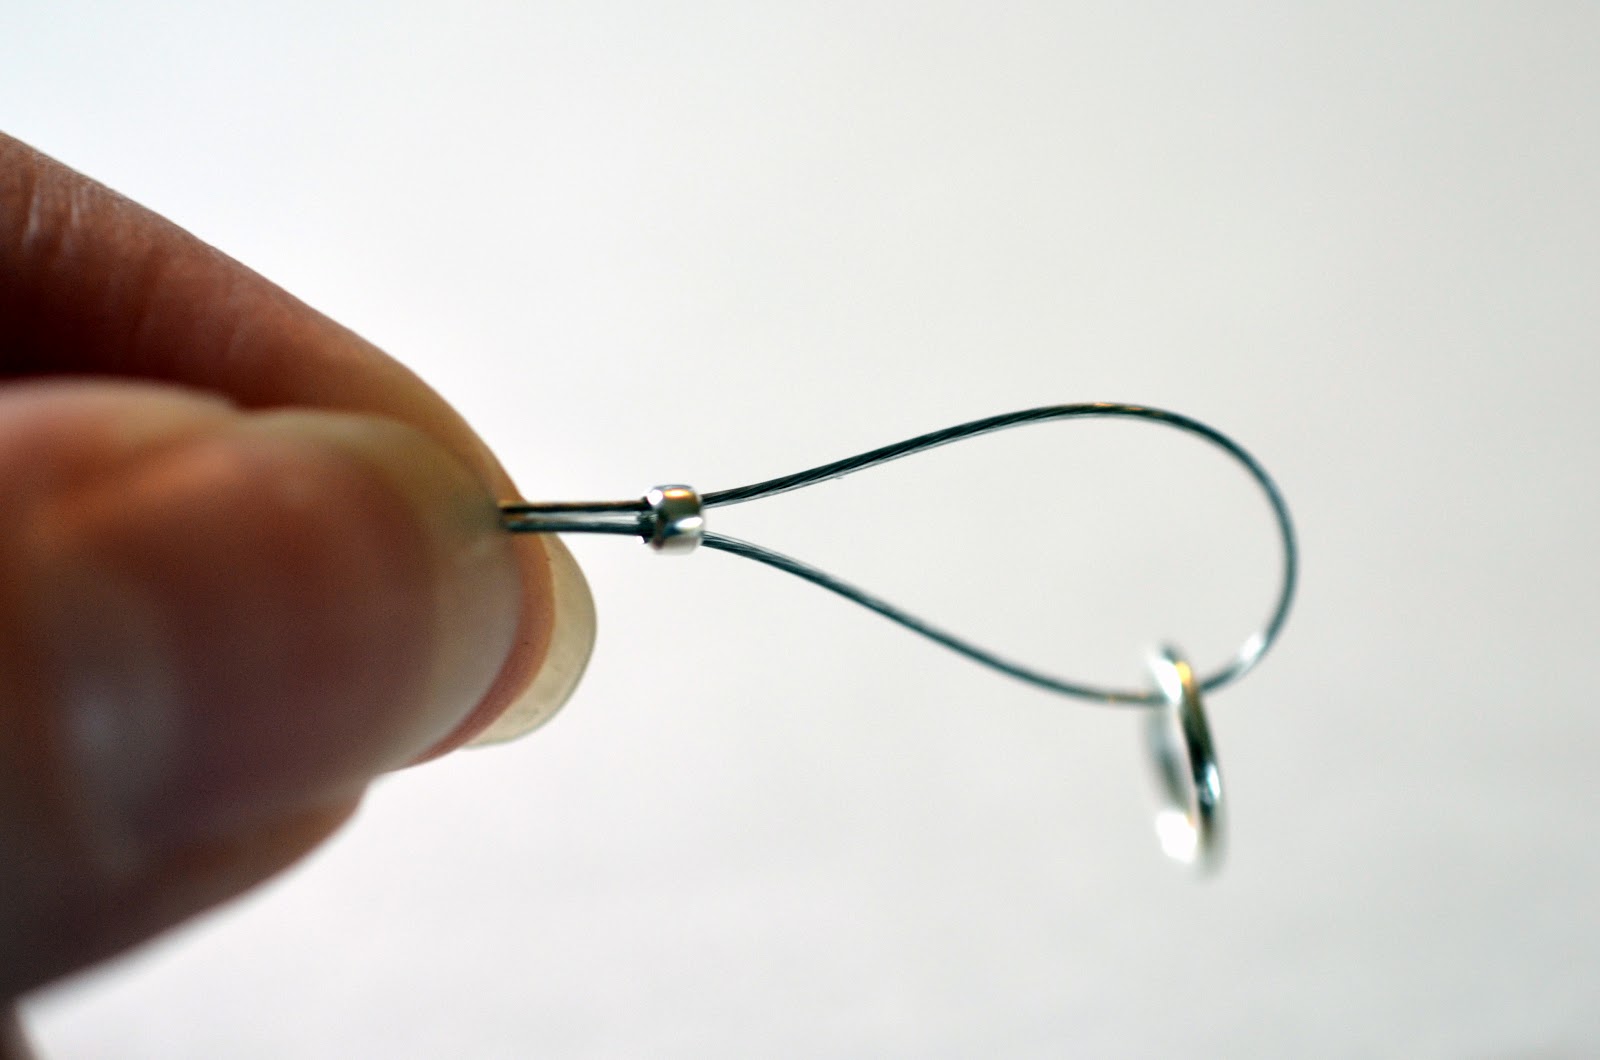
Next, we need to finish this part of the necklace. String on a crimp bead and then a jump ring to the loose end of the tiger tail.
String the end back through the crimp bead, like so. Push the crimp bead up to close up that gap, you want the crimp bead to be close to the jump ring.
To use the crimp tool, line the crimp bead up into the second section of the crimp tool. Just look at the picture, because I know I didn't explain that well.
Squish it down.
Open it up again, and position the now squished crimp bead into the first section of the tool. See how it got smushed into a C shape? You want it to then be smashed on top of itself again. Think of it as a double knot.
Smush it. Now it's nice and secure.
This is what it should look like finished. Push all the beads up against the crimp bead (make sure to thread it through both strands of tiger tail). Now we'll do it to the other side.
Now you can cut off the strand of beads from the spool. Start off the same way as you did on the other side.
However, on this side, you need to thread that extra strand of tiger tail back through the beads. A little tricky!
Just pull it through the first bead or two, and keep pulling and adjusting until it's nice and tight. Then crimp it like you did on the other side. Does that make any sense at all? I'm no good with words. Thank you, pictures.
Now, the cord. Tie the cord around the jump ring.
I dabbed a drop of E6000 in the knot to make sure it didn't come undone. I also fray checked the ends when I cut it.
Divide those sparkly beads in half. String half of them onto one side, and half of them onto the other side. (After you've tied the cord on the other side, that is.)
It should look something like this. Tie a knot at the ends of the beads so that they don't slide around all over. Then, tie another loop at the end, just like you did with the jump ring.
Attach the lobster clasp to one side and the extender chain to the other. I added a silver bead to the end for decoration. If you were able to understand any of that, you should be done!!
Lay it out on some rocks in your backyard and take pictures of it. Or wear it, your choice. :)
Please let me know if you have any questions! I feel like this was more of a visual tutorial rather than a wordy one, so if you need more words, shoot me an email.


2 comments:
I like your version better than the original! Great job!!!
Great work!
Thanks for stopping by Yellow Blackbird to comment. I am glad I found your blog and am now a follower!
Post a Comment