Showing posts with label nature craft. Show all posts

11.09.2010

Tutorial Tuesdays- Changing Leaves Wall Art

Confession: I totally just finished this. I was so zonked yesterday I just did not have the energy to do anything crafty! But never fear, Crafty Woman is here with some fabulous autumn wall art!

I've had this project in the makes for a few weeks now, and I was super excited to discover that yes, in fact, it was ready to be put together. You see, this project took prep work, it wasn't one of those "OMG I WANT TO DO THIS RIGHT NOW!" and then use crafty magic to make it appear. Nope, this was a "plan ahead" project. Ready for a story?

Once upon a time a beautiful princess was being chauffeured to the grocery store by her handsome prince. She couldn't help but notice all the stunning colors of the trees, and shouted "HALT!" to her prince. He slammed on the brakes and the princess scrambled out of the car and madly started plucking leaves off the tree. Instantaneously, her bag was filled with leaves and she eagerly took them home, mind buzzing with new projects. The End.

You'll need to do the same for your prep work! I gather TONS of leaves all from the same tree for consistency. I sorted and arranged the leaves and finally came up with two designs I liked: the leaves "changing" colors and the leaves "growing." I stole borrowed several of my hubby's accounting books and placed the leaves inside between sheets of waxed paper to press and dry them. Fast forward a few weeks. I opened the books and the leaves were ready! Huzzah!! Now, you're ready to start!

To make this lovely art, you will need:
  • Dried and pressed leaves (you can even use the microwave method from when I did my napkin rings!)
  • Large frame that will fit all the leaves (found mine for $4 at the thrift store)
  • "Background" to your art (I used burlap, but wrapping paper, scrapbook paper, spray painted poster board, whatever you want will work here!)
  • Scissors (not pictured)
  • Some kind of acid free, sticky adhesive (messed around with a few so it's not pictured here either, sorry)
  • Duct tape
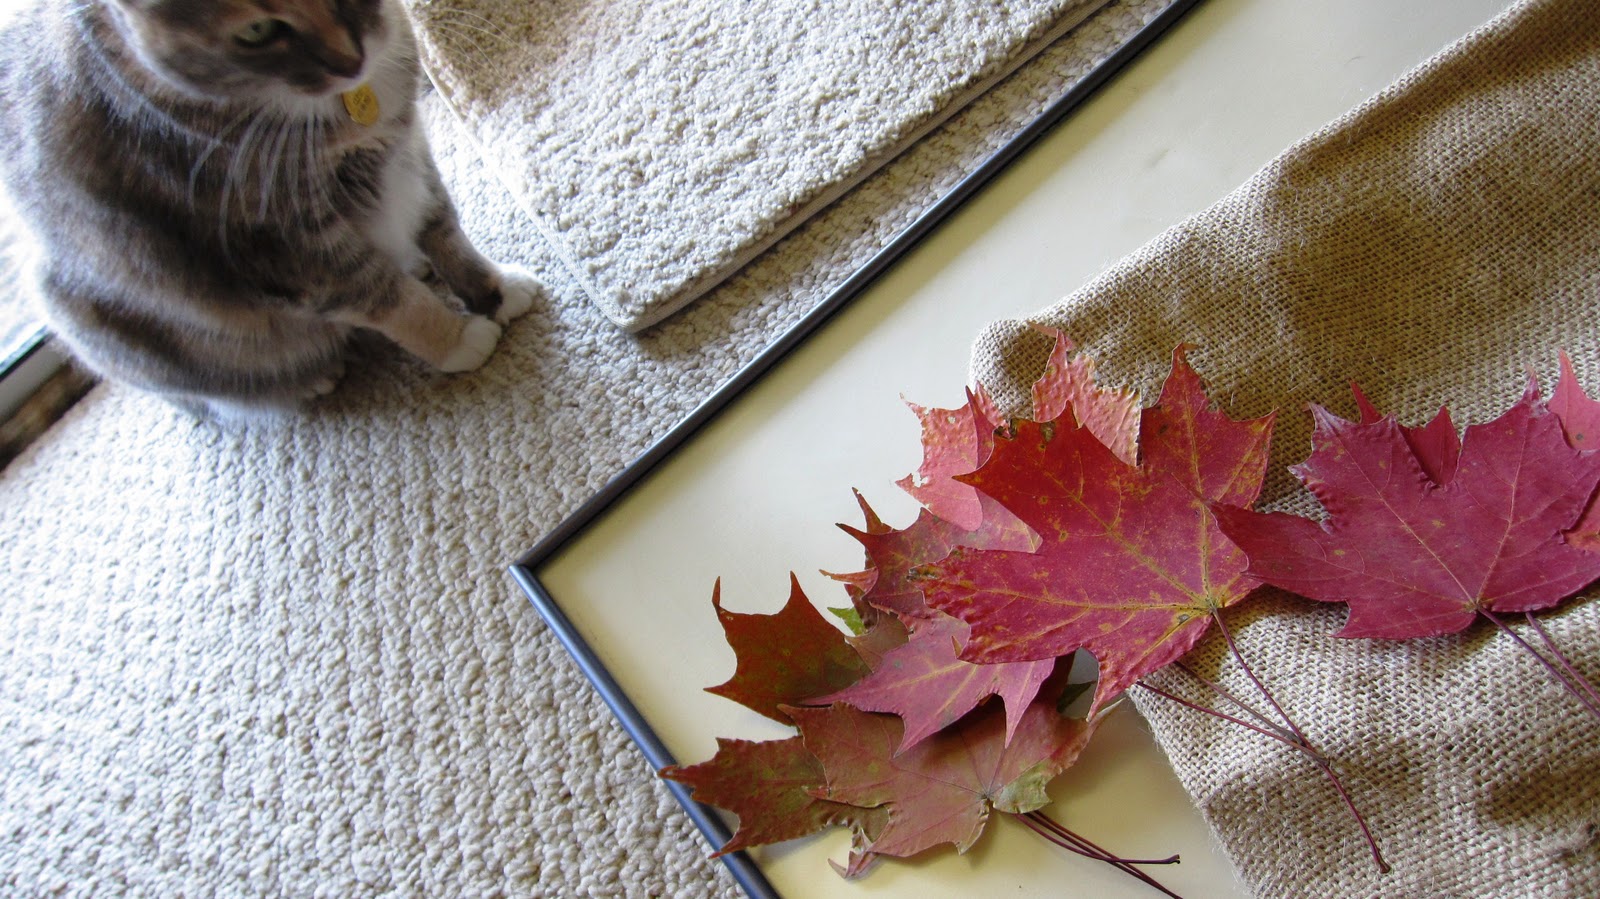
  • An adorable and playful kitty. 
Ok, you don't really need a cat, but Cleo was all up in my project today, so you'll see her a few times.

My burlap had been is my fabric bin for a while, so it was really wrinkled. I plugged in the iron, turned around to grab something and there was Cleo! She eventually got off once I started sliding the iron across the burlap. Oh, and burlap doesn't iron very well. It requires a very hot setting and lots and lots and lots of steam.

Once it was reasonably pressed, I laid out the cardboard/foam poster board on to of the burlap and cut out the burlap a few inches around on each side.

This is where the duct tape came in. I just folded the burlap over and duct taped it to the poster board. I did this all the way around, pulling pretty tightly so the burlap would lay flat against it.

I can't for the life of me turn this picture around. Sorry. You'll end up with a burlap covered cardboard/foam poster board thingy.

Arrange your leaves in a pleasing manner on your burlap. Since mine were "changing colors" I started with the green one at the top and ended with the red ones at the bottom. That's the adhesive I used, kind of like glue dots. I knew hot glue would ruin the leaves and I was too impatient for Elmer's or tacky glue, so I went with this It was just sticky enough to keep the leaves in place but they were still movable if I didn't' like the placement.
Cleo insisted on inspecting my work. She finally gave her approval.

I slid everything back into the frame and voila! Easy peasy art! Now just to figure out where to hang it....

Make sure to check out my "Link Parties" tab to see where I'm linked up! Take a look around, link up something yourself, have a little party and get really distracted looking at craft blogs. Happy crafting!

10.30.2010

Fall leaf napkin ring

In case you missed it, here is the project I did for my Naptime Crafters blog swap! I'm going to show you how to turn colorful fall foliage into a beautiful and festive napkin ring!

Before you even start your napkin ring, you'll need:
  • Colorful, smallish leaves (think smaller than your thumb)
  • Spray adhesive
  • Microwave
  • Microwave safe plate
I'm so lucky to live in a part of the world where I can literally find gorgeous leaves in my backyard! But if you need to, go on a walk in the park to find some amazing leaves.

I don't know what the name of this particular bush is, but this is where I got my leaves. You want to make sure to pick leave that are smooth, whole, and right off the plant. This way the colors are more vibrant and you have a better chance of finding blemish free leaves. Grab as many as you can, a portion of the ones you pick won't make it through to the final project.

The next thing you'll need to do is dry your leaves in some way. You can press them in books, iron them (under newspapers and kitchen towels of course), or wax them. I'm going to show you how to microwave your leaves! Arrange your leaves on a microwave safe plate.

You'll need to microwave your leaves between 30 seconds and two minutes (the fresher your leaves are, the longer you'll need to microwave.) Do it in 15 seconds increments so you don't set your leaves on fire. Also, please keep in mind that your leaves WILL darken as they are dried. See that leaf top right? It's halfway through changing, it started out that bright red and it's turning a darker red. You'll probably lose some leaves in this process.

These leaves are all ready! They should be flatish and more more stiff to the touch. Make a bunch of them, you'll probably break a few when you make the napkin rings.

Next you'll need to preserve your leaves. Use some kind of sealant/spray adhesive (check in the art section of your local craft store) and spray it all over your leaves to protect them. Make sure to do it outside!!

NOW you're ready to start your napkin rings! You'll need:
  • Dried leaves
  • Toilet paper/paper towel roll
  • Glue gun
  • Scissors (not pictured)
  • Embellishment for middle of your flower (I used a berry from the same bush I got the leaves.)

Cut a small length of your roll about a centimeter thick. This will be the base of your napkin ring.

Start gluing just the bottom of your leaves down on the circle. Wedge the next leave under the first one and glue down, continuing the process of overlapping your leaves all the way around. Be careful, the leaves are thin and hot glue is, well, hot! 

You'll have a somewhat spiky looking ring now. (Also make sure to pull off all the stringy glue gun pieces off before you take a picture of your work. Yikes!!)

I kind of like this look, so feel free to stop here!

But, if you're more into the smooth look, go back around and glue down the "spikes."

It will then look something like this! See that hot gluey mess to the left? We're going to cover that up next. :)

Take five extra leaves and glue them into a flower shape over the glueiest (yes I just made that word up) area you want to cover up. Glue an embellishment in the center (berry, pearl, bead, whatever you think looks good!)

And you are ready to entertain! This would be perfect for a Thanksgiving dinner table! You could even use the same concept to embellish place cards. And if you're a bit to pressed for time to go out and gather your own leaves, I'm sure faux leaves would be just as beautiful. :)

After a few days it's still holding up strong! You might want to add an extra layer of adhesive though, just to be safe. :)

Happy crafting! **Also, I've added several more new parties to my "Link Parties" tab so be sure to check out all the new places I'm partying!**


10.07.2010

Pinecone Flowers

Did you get a chance to vote in my "What do you want to see more of in my blog" poll? (Wow, that's a long, annoying name). Make sure if you didn't you take a second to do so! I want to know what YOU are interested in seeing.

Ok, on with the tutorial! Sorry it has been so long since I've posted one, it's been a little crazy around here with the start of a new job! This tute comes to you a la Martha Stewart. I borrowed the Encyclopedia of Crafts from the library a week or two ago and I have been loving it! She really is a genius! She features some pinecone crafts and the pinecone flowers were my favorite. I didn't really follow her instructions...but I can't say that this idea was mine. It was all Martha's.

Aren't they so pretty?? And the great thing is they're really easy to make!! To make one, you will need:

  • Pinecones (any kind, just make sure you shake all the bugs out!! You will scream when one crawls out during your project. Not that I would know...)
  • Coordinating felt
  • Scissors
  • Glue gun
  • Pruning shears (or any other kind of shears used for gardening. DO NOT USE SCISSORS FOR THIS!!!)
  • Some kind of embellishment for the center. Pearl, beads, whatever!

The first thing you need to do snip all the scales off your pinecones using SHEARS, NOT scissors. You will absolutely ruin any scissors if you try. So please, don't use scissors. I found the best way to do this is to sip them off in a V shape instead of straight across. This means you need to snip twice to get each scale off, but you'll get much more scale and a more even cut.

See? Pretty V shaped scales.

These are the ones I tried to cut straight across. FAIL. Most of them broke and were totally uneven.

 Once you've sniped off enough scales (if they all remain in tact you'll need less than one to make a flower) cut a circle out of your coordinating felt. The size can be whatever you'd like, big or small. 

Dot glue around the edge and carefully glue pinecone scales around the edge. 

Keep going around the edge. Then, do the same exact thing on the inner circle, overlapping the first layer. If you've got more felt, keep adding layers until you've reached the center. 

Glue on your embellishment and you're done! You can add a pin back to it, glue it to a headband, or anything you'd like! Martha suggests adding them to place cards or napkin rings. I have an idea for a whole bunch of these...but I'm going to keep it to myself this time. Maybe you'll see it soon!

Happy crafting!

Related Posts Plugin for WordPress, Blogger...