Showing posts with label Halloween. Show all posts
10.31.2011
From a girl with a computer in between Trick or Treaters
10.30.2011
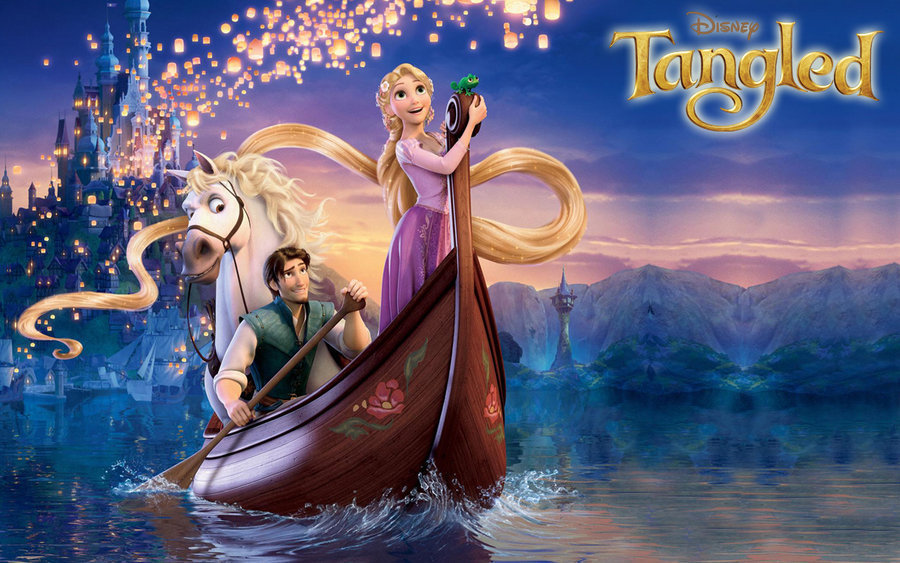
Rapunzel and Flynn {our Halloween costumes}
You know when you see previews for a movie, and the previews are SO AWESOME that you just can't wait to see the movie? But then when you see it you realize that the previews had all the good stuff and there was nothing left in the movie?
I hope that is not this post. I feel like I've hyped up these costumes a lot and I really hope it doesn't dissapoint! Especially because the pictures aren't too great. In case you don't like my {facebook page}, it's been snowing here on the east coast. It NEVER snows this early here. Soooo my plans for a fun outdoor photoshoot were squashed. I had to search the house and find one blank wall near a window and that was next to impossible. I hope to do another photoshoot in the next few days when it warms up a little and it isn't drenched outside.
Until then, please enjoy the pictures I have. Even though the costumes aren't perfect I still had fun sewing them. :) And wearing them, I love Halloween!
It was so so so so so cold. I had to wear pink Under Armor under my dress so I wouldn't freeze my tush off. It worked out since she has pink sleeves but it doesn't quiiiiiiite work in the neckline area.
He couldn't quite master this face....
I hope that is not this post. I feel like I've hyped up these costumes a lot and I really hope it doesn't dissapoint! Especially because the pictures aren't too great. In case you don't like my {facebook page}, it's been snowing here on the east coast. It NEVER snows this early here. Soooo my plans for a fun outdoor photoshoot were squashed. I had to search the house and find one blank wall near a window and that was next to impossible. I hope to do another photoshoot in the next few days when it warms up a little and it isn't drenched outside.
Until then, please enjoy the pictures I have. Even though the costumes aren't perfect I still had fun sewing them. :) And wearing them, I love Halloween!
It was so so so so so cold. I had to wear pink Under Armor under my dress so I wouldn't freeze my tush off. It worked out since she has pink sleeves but it doesn't quiiiiiiite work in the neckline area.
{source}
{source}
{source}
{source}
He couldn't quite master this face....
{source}
{source}
{source}
Overall the costumes were a huge hit. I loved all the kids coming up to us and pointing and saying "You're Rapunzel and Flyn!!" Personally I think the hubs looks WAY WAY WAY better than I do. That miiiiight be because I think he is unimaginably handsome, but really there is no way to tell. ;) I think I'll do a post in a few days with the patterns involved and a few other behind the scenes funness.
What about you? What were you for Halloween?
10.27.2011
Flynn Rider vest {a tutorial}
Ok, I need to first apologize for these awful pictures. (And my writing. It’s too late for me to be in front of a keyboard.)This vest was sewn during the wee hours of the morning when I was finally done with my work for the day. Translation: awful basement lighting + sleepy Amie = pretty bad pics. It’s kinda cool though, because the color of the fabric magically chances color from picture to picture!
…yay…
Hopefully you get the idea though.
You probably already know that David and I are going to be Flynn and Rapunzel for Halloween this year. I decided to make the costumes (with some help from my mom and some great suggestions from you guys). I made my dress entirely from patterns so no tutorial there, but I totally winged this vest! Honestly the only technique I really used was the making of the actual vest, the rest was merely looking at pictures of Flynn’s vest online and figuring out how I could make my look the same. There was no planning here.
I thought his vest would be totally easy, but it turns out there are a lot of little details that I didn’t even notice on his vest! I did my best to point them out with the help of Picnik. I decided to forgo the collar of the vest, something told me David wouldn’t be too thrilled with such a high collar. But I’ll walk you through everything else I did
To make one, you will need:

(Depending on if you got regular fleece or anti pill fleece, your fabric may or may not have a right/wrong side.) Turn the t shirt inside out, stuff the sleeves in, fold it in half, and lay it down on your folded fabric (right side up). Trace around the t shirt (I used chalk) with an extra half inch for seam allowance. Add a little extra room in the shoulders too, because Flynn has sleeves! Cut it out. This will be the back piece.

Ta dah!! Back piece.

Next, you’ll need two front pieces. Lay the t shirt back down, trace it again, but this time NOT on the fold (right side up again). I added a little bit to the front (which is why it’s slanted in the front instead of straight) so there would be room for the vest to button. Also added a slight v neck.

Three pieces now, a back piece and two front pieces. That’s all you need!

Remember how I pointed out that the vest has cool texture? You could probably use some sort of corduroy or something…but fleece was on sale and I didn’t have to finish the edges if I didn’t want to, score one for the cheap/lazy woman! Anyway, I got the idea from {this faux chenille blanket tutorial} I loved how the lines and lines and lines of sewing made pretty texture, so I used the same technique her! Using a picture of Flynn’s vest as a guide, I drew out where I wanted to sew. The lines are about 1 1/2 inches apart. I tried to use a ruler, I really did. But I failed. Sew a straight line along the lines you drew.

The effect is pretty subtle when you stare at it, but it really adds to the overall costume and it’s totally worth the extra half our of work.

Forgot to take a picture, but do the same thing for the lines above the…I think it’s called the yolk of the vest? That diagonal thing along the chest. So you’ll have sewn vertical lines running down under the chest, and diagonal lines above. Just look at the picture, it will make more sense. I sewed a little strip of fleece down over the diagonal line I made because that’s what it looked like I should do.

Once I was done texturizing each front piece, I hemmed it along the edges 1/4 inch. Since fleece doesn’t fray, I only folded it down once.

Looking pretty good so far! Love all that texture.

Next, sew the vest together. Pin the right sides of each front piece to the right sides of the back piece. Sew, using a straight stitch and 1/2 inch seams. Don't sew the front pieces together!

The sleeves. I put the vest on the hubs and marked with the chalk where his shoulders were. (Remember how we left a little bit of extra fabric in the shoulders?) I drew a straight line down from that mark, and then sewed along it using a teeny tiny zig zag stitch (I actually used the “button hole” stitch.) They aren’t real sleeves…but it’s close enough!

I was going to put belt loops on anyway, but then I was looking at pictures and noticed that he actually did have belt loops. Awesome. I put the vest back on the hubs and marked his waist with the chalk. Then, just three strips of felt sewed directly onto the back. One on each side seam, one in the middle. I did nothing to try and hide seams here, you could probably be all seamstress-like and do that but my laziness got the best of me.

To make the “buckles” I just used hair ties and buttons. Flynn’s vest had some pretty cool hook and eye bronze looking buckles, but for the sake of time, money, and laziness, I went with this method. Mark where you want your buckles to be wit the chalk. Use three thick, brown hair ties, and sew them right on the vest. Be careful and go slowly, your machine might put up a fuss sewing through all that elastic. To make it more squarish, my mom suggested sewing it down twice, once at the top and once at the bottom, so when the hair tie is pulled it looks more like a rectangle. Does that make sense?

Oh, I should also mention that I added some extra fleece in the back for stability. One single layer of fleece might not like be pulled and tugged on so much. Sew-in interfacing would have been good here, but I lacked it in my stash.

The next part SEEMS to be purely aesthetics, but sneaky you, you’re adding stability to the buttons. Yay! Mark the vest directly opposite of the hair ties, where the buttons will go. Sew down a small rectangle.

Sew them on both sides! Those buttons are gonna get a lot of action, the fleece needs to hold up to it all!

And sew on the buttons on top of those rectangles. These are lovely coat buttons from my grandma, thanks Mugga!!

Slap the vest on one very patient man. I’ll post an updated picture when I get one, hubs is not too keen on getting dressed up like this unless he has to.
…yay…
Hopefully you get the idea though.
You probably already know that David and I are going to be Flynn and Rapunzel for Halloween this year. I decided to make the costumes (with some help from my mom and some great suggestions from you guys). I made my dress entirely from patterns so no tutorial there, but I totally winged this vest! Honestly the only technique I really used was the making of the actual vest, the rest was merely looking at pictures of Flynn’s vest online and figuring out how I could make my look the same. There was no planning here.
I thought his vest would be totally easy, but it turns out there are a lot of little details that I didn’t even notice on his vest! I did my best to point them out with the help of Picnik. I decided to forgo the collar of the vest, something told me David wouldn’t be too thrilled with such a high collar. But I’ll walk you through everything else I did
To make one, you will need:
- A yard or so of bluish fleece
- Husband’s t shirt (or little man’s or whoever this is for)
- Lots of matching thread
- Three thick hair ties
- Three large coat buttons
- A lot of patience. Ok, that was just me because I had to figure this all out along the way
(Depending on if you got regular fleece or anti pill fleece, your fabric may or may not have a right/wrong side.) Turn the t shirt inside out, stuff the sleeves in, fold it in half, and lay it down on your folded fabric (right side up). Trace around the t shirt (I used chalk) with an extra half inch for seam allowance. Add a little extra room in the shoulders too, because Flynn has sleeves! Cut it out. This will be the back piece.
Ta dah!! Back piece.
Next, you’ll need two front pieces. Lay the t shirt back down, trace it again, but this time NOT on the fold (right side up again). I added a little bit to the front (which is why it’s slanted in the front instead of straight) so there would be room for the vest to button. Also added a slight v neck.
Three pieces now, a back piece and two front pieces. That’s all you need!
Remember how I pointed out that the vest has cool texture? You could probably use some sort of corduroy or something…but fleece was on sale and I didn’t have to finish the edges if I didn’t want to, score one for the cheap/lazy woman! Anyway, I got the idea from {this faux chenille blanket tutorial} I loved how the lines and lines and lines of sewing made pretty texture, so I used the same technique her! Using a picture of Flynn’s vest as a guide, I drew out where I wanted to sew. The lines are about 1 1/2 inches apart. I tried to use a ruler, I really did. But I failed. Sew a straight line along the lines you drew.
The effect is pretty subtle when you stare at it, but it really adds to the overall costume and it’s totally worth the extra half our of work.
Forgot to take a picture, but do the same thing for the lines above the…I think it’s called the yolk of the vest? That diagonal thing along the chest. So you’ll have sewn vertical lines running down under the chest, and diagonal lines above. Just look at the picture, it will make more sense. I sewed a little strip of fleece down over the diagonal line I made because that’s what it looked like I should do.
Once I was done texturizing each front piece, I hemmed it along the edges 1/4 inch. Since fleece doesn’t fray, I only folded it down once.
Looking pretty good so far! Love all that texture.
Next, sew the vest together. Pin the right sides of each front piece to the right sides of the back piece. Sew, using a straight stitch and 1/2 inch seams. Don't sew the front pieces together!
The sleeves. I put the vest on the hubs and marked with the chalk where his shoulders were. (Remember how we left a little bit of extra fabric in the shoulders?) I drew a straight line down from that mark, and then sewed along it using a teeny tiny zig zag stitch (I actually used the “button hole” stitch.) They aren’t real sleeves…but it’s close enough!
I was going to put belt loops on anyway, but then I was looking at pictures and noticed that he actually did have belt loops. Awesome. I put the vest back on the hubs and marked his waist with the chalk. Then, just three strips of felt sewed directly onto the back. One on each side seam, one in the middle. I did nothing to try and hide seams here, you could probably be all seamstress-like and do that but my laziness got the best of me.
To make the “buckles” I just used hair ties and buttons. Flynn’s vest had some pretty cool hook and eye bronze looking buckles, but for the sake of time, money, and laziness, I went with this method. Mark where you want your buckles to be wit the chalk. Use three thick, brown hair ties, and sew them right on the vest. Be careful and go slowly, your machine might put up a fuss sewing through all that elastic. To make it more squarish, my mom suggested sewing it down twice, once at the top and once at the bottom, so when the hair tie is pulled it looks more like a rectangle. Does that make sense?
Oh, I should also mention that I added some extra fleece in the back for stability. One single layer of fleece might not like be pulled and tugged on so much. Sew-in interfacing would have been good here, but I lacked it in my stash.
The next part SEEMS to be purely aesthetics, but sneaky you, you’re adding stability to the buttons. Yay! Mark the vest directly opposite of the hair ties, where the buttons will go. Sew down a small rectangle.
Sew them on both sides! Those buttons are gonna get a lot of action, the fleece needs to hold up to it all!
And sew on the buttons on top of those rectangles. These are lovely coat buttons from my grandma, thanks Mugga!!
Slap the vest on one very patient man. I’ll post an updated picture when I get one, hubs is not too keen on getting dressed up like this unless he has to.
Outfit breakdown
- Shirt: Owned it, we’ve got tons of white church shirts
- Vest: I just told you how to make that….
Belt: Owned it - Pants: Owned, than you Best Buy for making them a part of your uniform
- “Boots”: from my sister’s high school drama department, they are just pull on prop boots
- Shoes: Sunday shoes
- Satchel: An old purse of mine from my Mugga, I think it’s Fossil?
A nice, cheap costume, Which is way more than I can say for my dress! Pics of that to come soon. And please let me know if this doesn’t make any sense. It’s late, I winged the whole thing, and….actually I can’t think of another reason.
Labels:
easy,
fabric,
fleece,
Halloween,
hubby craft,
just for fun,
Sewing,
tutorials
10.21.2011
No commitment Halloween wreath plus an almost funny story
Now that it is 10 days before Halloween, you've probably seen enough wreaths to last you until next year.
But humor me, kay? Because I like mine.
I love the colors (purple is a GREAT Halloween color!) I love the polka dots, I love the arglye-ish wrap around ribbon thing I did. Love the spider web ribbon tied in bows. It's just cool.
But why is it called "no commitment?"
Because not one thing is cut, glued, or permanently altered in any kind of way.
See? That's all pinned down!
Let me tell you a story.
It's 11pm. Amie is blogging, David is playing some kind of MMORPG. Suddenly.
"THAT'S IT!!!!"
David sees his wife suddenly stand up, put her laptop down, and stomp over to her craft area. (Area, not room. sad face.) She starts pulling random things off shelves, digging through the mess under the air hockey table, and plops herself down on the floor with a big pile of stuff.
".........honey? What are you doing?"
"Making a wreath!!!"
"....why?"
"Because it's Halloween!!!"
"Whatever you want honey."
You see, all of our Halloween decorations are in a storage unit 20 miles away. And to find a chunk of time long enough to drive down, pick it all up, drive back, and put it all up is kind of impossible. So we decided to forgo getting all of it and just do without decorations.
I immediately regretted that decision. Halloween is my FAVE-O-RITE holiday. How can I NOT decorate? I tried to suppress the urge. I mean come on, we live in a basement. All our stuff is crammed into, onto, and under all our furniture. We don't have defined spaces, it's mostly just one big room. In short: it's really hard to decorate. No mantels, one window, no front door, no shelves that aren't completely full of crap. Ugh.
I failed at suppressing. I just snapped at late last week and grabbed a whole bunch of stuff. Two rolls of black tulle, a roll of orange polka dot ribbon, purple polka dot ribbon, spider web ribbon, and an old wooden wreath form. I was about to grab my glue gun when I thought "Wait....Amie you HAVE a Halloween wreath. You shouldn't make another one."
Yes, but I don't have it HERE. I compromised my challenging myself to make the wreath without cutting or gluing anything. So essentially I could just unwind everything, roll it back up, and use all the materials for something else.
And I succeeded! I tied the tulle around the wreath and wrapped away. I taped the ribbon down in the back and wrapped that around too, pinning it when I was done. Did the same for the purple ribbon. And I took all three yards of that spider web ribbing and tied over a dozen little bows from one continuous strip. Pinned those down too. BOO YA.
Essentially, I can take the whole thing apart and have perfectly usable materials again. But we both no that probably won't happen, mostly becauseI am very lazy I like it too much. Plus it was totally free, which is awesome.
Oh, that weird mess of orange ribbon at the top WAS the hang-y thing-y. But it didn't work so we wrapped it up. Ignore it please.
Have you ever made a non commitment craft before? Share with me!
But humor me, kay? Because I like mine.
I love the colors (purple is a GREAT Halloween color!) I love the polka dots, I love the arglye-ish wrap around ribbon thing I did. Love the spider web ribbon tied in bows. It's just cool.
But why is it called "no commitment?"
Because not one thing is cut, glued, or permanently altered in any kind of way.
See? That's all pinned down!
Let me tell you a story.
It's 11pm. Amie is blogging, David is playing some kind of MMORPG. Suddenly.
"THAT'S IT!!!!"
David sees his wife suddenly stand up, put her laptop down, and stomp over to her craft area. (Area, not room. sad face.) She starts pulling random things off shelves, digging through the mess under the air hockey table, and plops herself down on the floor with a big pile of stuff.
".........honey? What are you doing?"
"Making a wreath!!!"
"....why?"
"Because it's Halloween!!!"
"Whatever you want honey."
You see, all of our Halloween decorations are in a storage unit 20 miles away. And to find a chunk of time long enough to drive down, pick it all up, drive back, and put it all up is kind of impossible. So we decided to forgo getting all of it and just do without decorations.
I immediately regretted that decision. Halloween is my FAVE-O-RITE holiday. How can I NOT decorate? I tried to suppress the urge. I mean come on, we live in a basement. All our stuff is crammed into, onto, and under all our furniture. We don't have defined spaces, it's mostly just one big room. In short: it's really hard to decorate. No mantels, one window, no front door, no shelves that aren't completely full of crap. Ugh.
I failed at suppressing. I just snapped at late last week and grabbed a whole bunch of stuff. Two rolls of black tulle, a roll of orange polka dot ribbon, purple polka dot ribbon, spider web ribbon, and an old wooden wreath form. I was about to grab my glue gun when I thought "Wait....Amie you HAVE a Halloween wreath. You shouldn't make another one."
Yes, but I don't have it HERE. I compromised my challenging myself to make the wreath without cutting or gluing anything. So essentially I could just unwind everything, roll it back up, and use all the materials for something else.
And I succeeded! I tied the tulle around the wreath and wrapped away. I taped the ribbon down in the back and wrapped that around too, pinning it when I was done. Did the same for the purple ribbon. And I took all three yards of that spider web ribbing and tied over a dozen little bows from one continuous strip. Pinned those down too. BOO YA.
Essentially, I can take the whole thing apart and have perfectly usable materials again. But we both no that probably won't happen, mostly because
Oh, that weird mess of orange ribbon at the top WAS the hang-y thing-y. But it didn't work so we wrapped it up. Ignore it please.
Have you ever made a non commitment craft before? Share with me!
10.13.2011
Guest Post: Felt pumpkins from Artfully Caroline
Yay! Caroline is here today! In case you're new, Caroline is my bloggy friend turned real life friend once we found out we lived 20 minutes away from each other. We get together almost every month to craft, she is my {trading posts} partner! She's always full of fantastic ideas, and this one is no different.
---------------------------------------------------------------------------------------
I love to cook, sew and craft for my home, family and friends. Creating keeps me sane and happy in an otherwise crazy stressful busy life. Here are a few of my latest creations:
As you may know Amie and I are also neighbors in real life and get to visit each other and craft together every so often. So I'm thrilled to be visiting Amie's blog today to show you how to make this cute addition to your fall decor:
With a bit of orange fleece and some scraps of green crushed velvet, I sewed my first pumpkin last year.
For this project you will need
- 1/4 yard of orange fleece or felt
- Stuffing material
- Thread and needle
- A sewing machine that doesn't cringe about thick fabric (my old Singer would have been a bad candidate but my faithful Pfaff just went along with it).
- Cut 6 ( roughly 7 inch long by 2 wide) wedges of the orange fleece/felt
- Fold in half lengthwise and stitch a 2 inch pintuck on both ends
- This will define the shape of the pumpkin i.e flatten the top and bottom
- This is how it look from the wrong side (Left) and the right side
- Sew 2 wedges together wrong side togethers (i.e. pinktucks outside)
- Add a third wedge - You have now a half pumpkin
- Sew the second half pumpkin then attach the two halves on one edge
- Cut a piece 2x 4 inch piece of green fleece, felt or crushed velvet
- Fold in half and attach to the top of your pumpkin
- Stitch the last seams with the pumpkin inside out leaving a 2 inch opening
- Turn the pumpkin right side out and stuff it
- Stitch the opening
- Stitch some ridges to the stem
- Optional : add a leaf to your stem
Et voila !
Labels:
felt,
guest posting,
Halloween
Subscribe to:
Posts (Atom)