-------------------------------------------------------------------
When Stefi contacted me to do a tutorial for her "Love is Chic on Valentine's week" I honestly thought "How could I possibly come up with something chic enough for Stefi??" And I kind of freaked out a little! So I took a deep breath, and thought, "Hmmm, well, when I think of love, I think of roses! But what could I do with roses..." My mind wandered to jewelry making, since it IS one of my favorite things to do, and then I thought, "What is the most chic piece of jewelry out there? Duh! Bib necklaces!"
- Sheets of felt in the colors of your choice
- Glue gun and extra glue sticks
- Chain
- Pearls or other embellishments
- Clasp with two pieces (not pictured because I hadn't decided on one yet)
- Needle nose pliers (not pictured because I totally blanked!)
- Scissors (again, totally blanked)
.....got em?
The first thing you'll need to do is make the roses for your necklace. Take a sheet of felt, and cut a half inch wide strip of felt that's flat on the bottom and has bumps on the top. These do not (and should not!!) be all nice and uniform. Make them different sizes, different shapes, different heights, different lengths. Go crazy! You'll end up with a bumpy strip that looks like the one pictured above.
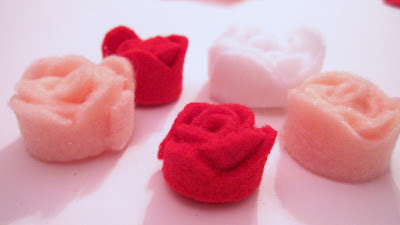
(Is your glue gun plugged in?) Next, roll up your strip! Start at one end and roll it up like you would a crepe! There really isn't a science to this. Be amazed as the rose takes shape. Add a dab of hot glue at the end so it doesn't unroll and...
You'll end up with little felt roses! Make them all different sizes with different colors. I made some where I cut the strip on the short side of the felt, the long side of the felt, and some with two strips of felt! Go crazy again! This is a fun project!
When you've got enough, start playing with them. Arrange them into a sort of U shape, move some around, take some away, add some in, make it look nice!
When you like the shape, glue your roses onto a large piece of felt. I decided to embellish mine with different colored glass pearls. Make sure every thing is nicely glued down with your BFF the glue gun. Then, cut around the whole shape.
Measure the chain to whatever length you'd like and cut/open up the links to remove it from the rest of the chain. Turn your bib piece over and go crazy with the glue gun! (Wow, how many times can I say "go crazy" in one tutorial?) Glue the heck outta it, and make sure your chain is laid down at least an inch into the bib, we don't want it falling off!
While the glue is still hot, quickly flip over your piece and stick it onto another piece of felt. Cut around the second piece.
You're almost done! Find the middle of your chain and open one of the links (by TWISTING the link open, not pulling it apart! Click here for help if you need it.) Slid your clasp into the open link. Twist the link shut, and then repeat with the other side of the chain with the second half of your clasp. I went with this cute heart toggle clasp to go with the theme.
Once you've added your clasp you are DONE my friend! Take that baby out, point it out to your friends, and proudly say, "Yeah, I made that."
I can attest that it looks quite lovely with a little black dress. :)


7 comments:
that looks so cute on you, love the colors and it looks easy to make, nice.
LOVE this!!! Posting the link on my fb page :)
Just love this. So so nice. I do so want to make one. Thanks for sharing the process.
Linda
SO cute! I love it!
Congrats on the feature :D
so very pretty! I love these.
megan
craftycpa.blogspot.com
Love the little roses! Thanks for linking up to Craft Couture Monday.
this is so pretty!!! Here’s another party if you would like to link up… http://www.bubblynaturecreations.com/2011/03/project-party-weekend-5-ways-to-re.html
Post a Comment