---------------------------------------
My name is Cami I've got a problem.
First of all, I like to craft. A lot. I mean, a lot a lot.
Secondly, I also lack the organizational skills that most people pick up in the 3rd grade (Which my husband could attest to).
and lastly, I have discovered a new love, which is my blog over at
All these things combined make for a messy lively home, and sometimes a less than happy patient husband
I am a immature simple girl who loves a lot of things.
I love my flannel "ugly jammies".
I love waking my husband up at 2 am to tell him a funny joke.
I love eating all of the Pringles in a can because I can't stop eating.
I love melting gummy bears to the car dashboard.
But most of all, I love creating....which is why my house routinely looks like Chernobyl.
So check me out over at
I swear, you will seriously love it! (Haha...get it??)
And now what all of you are waiting for...the tutorial!
Inspired by all of Amie's cute jewlery designs!
Triple Banded Bracelet
Difficulty: Easy
Time: 20 minutes
Cost: less than a dollar
Fun-ness: ABSOLUTELY!!
Materials
Size J Crochet Hook
100% Cotton Yarn
Fabric of choice
Yarn Needle
Glue Gun
Directions
Step 1: Creating a Chain
Create a Slip Knot. Chain 70 (or 75 for a larger wrist) and tie off, leaving a 5 inch yarn tail. Fold into 3 parts, leaving one side a little longer than the others (this will be used for the loop in step 2)
Step 2: Creating a Loop
Thread your yarn needle onto your yarn tail. Sew the tail through all three strands multiple times to connect them and form your loop. Tie off.
Step 3: Making the Rosette
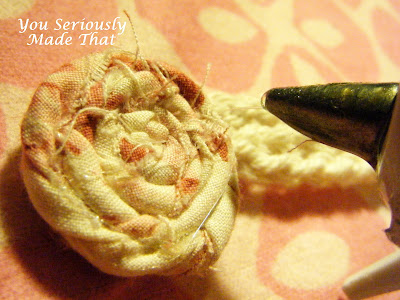
Cut your fabric into a 1 inch by 8 inch strip. Twist the fabric into a tight strand, and then wrap into a rosette shape, hot gluing as you go. Hot glue the rosette onto a circular piece of felt.
Step 4: Putting It Together
Using your glue gun, attach the center of the rosette onto the three loose strands (opposite of the loop). Make sure it is attached securely.
And that's it!! You're done! Finito! Finished!
And when someone comes asking, you can say
"I seriously made that!"
Thanks again Amie for having me on your awesome blog! You are a rock star!!
Don't forget to check out my my blog at
---------------------------------------
Yeah, she seriously made that. Didn't I tell ya she was great? Thanks for fulfilling my need for you to be here Cami. :)


2 comments:
WAY CUTE! I could make that too. Love it when I see project I wouldn't have thought of. Thanks so much!
This does look like fun! I like making easy crafts.:) My sister says a craft should take a few minutes to do and look like it took hours. hahahha
Linda
Post a Comment