Welcome to part
two of a
four part jewelry making mini series! Make sure to check out
part one which goes over basic tools and supplies for jewelry making.
Today we are going to cover the two basic skills for jewelry making. Yes, two. Just knowing these two skills will open up a world and pretty things for you. The first is opening jump rings, the second is making a loop. The second is much more difficult than the first, but after a few practice rounds you'll notice that you get better and better each time. Let's start with jump rings.
Opening jump rings
You may think opening a jump ring would be easy, just pull it apart. WRONG! You should never, ever "pull apart" a jump ring. It will distort it and make it look funny. Instead, you must twist it open!
Hold the jump ring securely in your round nose pliers. (Don't squeeze too hard, or you will mar the metal. Marred metal = ugly metal.) It's best to use your fingers whenever possible when making jewelry, because metal pliers will mar metal findings. Remember, marred metal = ugly metal. So if you can gently twist it apart, great! If not, use your needle nose pliers to help you.
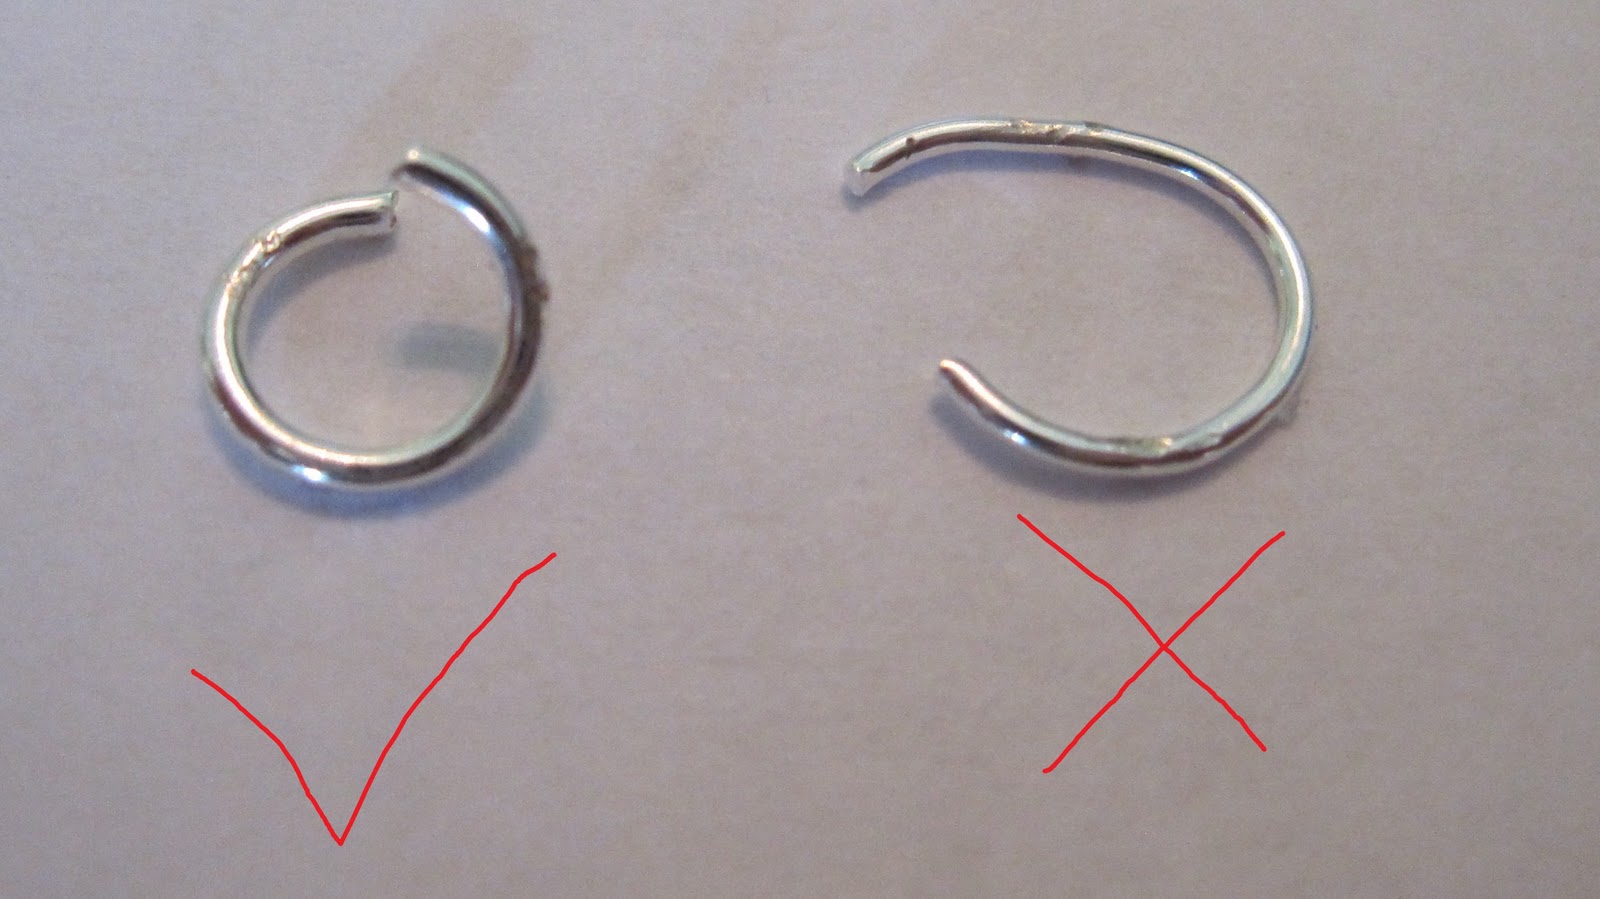
Gently twist open the jump ring. It should look like this, nicely twisted open.
On the left is the correct way to open a jump ring. On the right is the wrong way. Twist, don't pull! (See all the marring of the jump rings? I tried to enlarge the pictures so you could see the ugliness of it. Don't work the metal too roughly, use as gentle of a touch as you can.) To close the jump ring, simply twist back together. Easy peasy!
Creating a loop
Creating a loop isn't quite so easy peasy. It takes some practice to learn the metal and figure everything out, and it will be a while before you can create smooth, circular loops like on these eye pins. But never fear! Practice makes perfect.
Remember, use your fingers as often as you can when working with metal. Before you even get started, string any beads you want on the eye (or head) pin. I chose to just have a single tan colored glass pearl for this project. The eye pin I used is way too long but I wanted to show you how much easier it is to work with a longer one when you start out. When you're done stringing your beads on, you need to create a right angle with the leftover length of the pin. Hold it in your round nose pliers....
And carefully beeeend the wire over to create a right angle.
Reposition your pliers so that one end is underneath the right angle the the other is on top, as shown above.
This is why round nose pliers are so magical. Carefully bend the wire all the way around the top of your pliers. Make sure its nice and fitted over the pliers so you'll get a nice loop. Keep bending until you can't bend it anymore.
Keep bending! You'll end up with something that looks like a fish hook with a lot of extra wire.
This is what it looked like after all of my bending. Pretty funny huh?
Cut off the excess wire with your wire cutters, make sure to line up where you cut with where the loop starts. You want an O shape, not a C shape.
Still looks a bit funny. In this one I didn't quite cut enough, so after I took the picture I snipped off about a half a millimeter more.
Use your round nose pliers to pinch the bottom of the loop in place (use the very tips of of pliers if it's a tight squeeze.)
And you are done!! I left mine just slightly open so I could slip in an ear wire to create...
These lovely maple leaf earrings. Keep practicing your loops! Tomorrow we will put them to good use making a lovely pair of earrings for a night out!


2 comments:
thank you for these great tips! I can't wait to try them out.
Awesome tute Amie!!
Post a Comment